We feel very happy for the new recording development. This time we provide screen recording start for you to make more amazing works. Some of the functions are not easy to get so we tell you some brief introduction. Please follow the steps bellow to start streaming or recording.
Start with auto-configuration
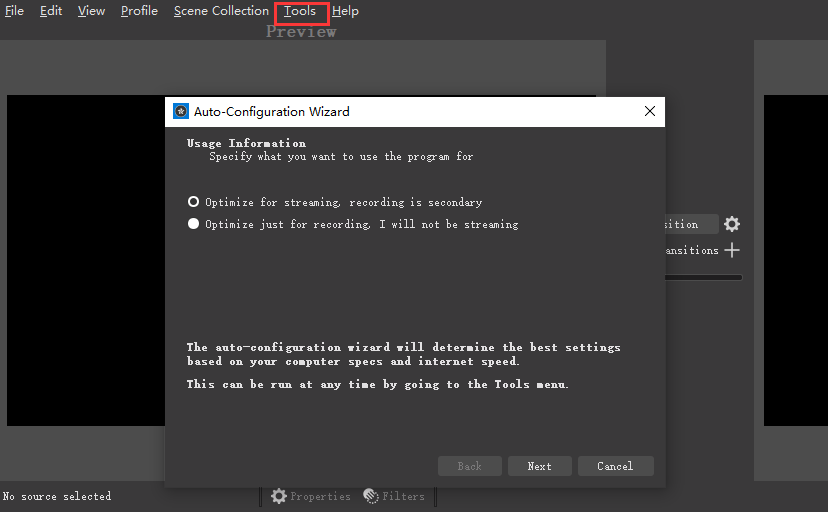
When you have downloaded screen recording star, you need to set up Auto-Configuration Wizard. It can be easily find in the TOOL menu. If you are not familiar with screen recording star but want to get started quickly, the following information we write will be helpful to you. Auto-Config Wizard can help you test system condition and find a setting that is appropriate to your PC. Two options for your select, the first is “Optimize for streaming ,recording is secondary”, the second is ”Optimize just for recording, I will not be streaming”. You can shift the settings anytime. But you have to understand the effect of the function.
- Check your audio devices
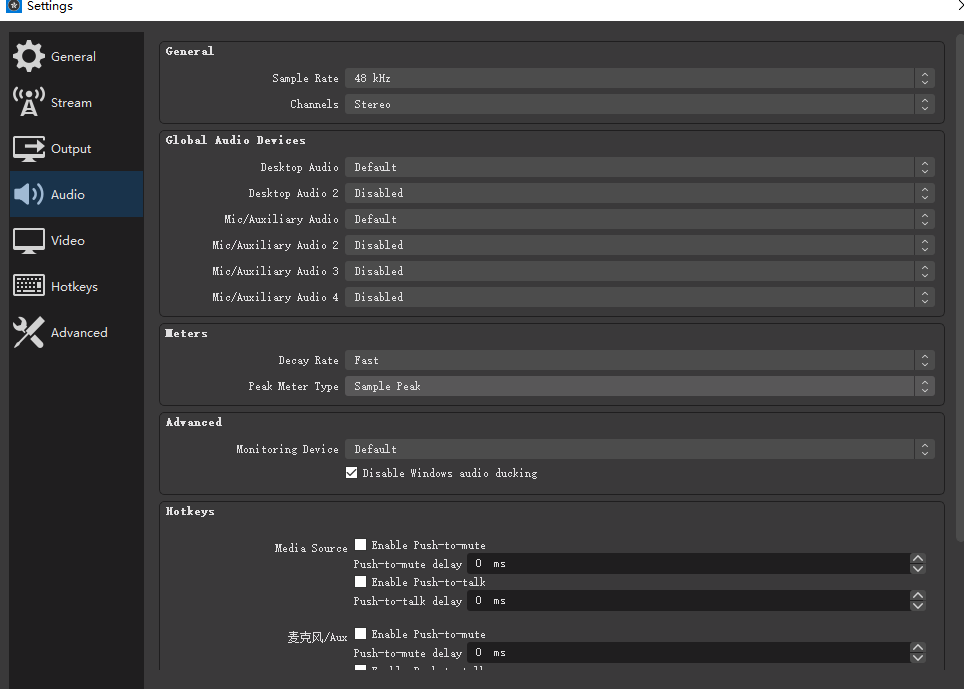
Screen recording start can capture your system default desktop audio device and microphone. Please confirm it by checking the volume meters in the mixer section of the home page to make sure the volume meters are active. If they are not activated or capturing the wrong device, please find and click on settings-audio-select the global audio devices.
- Add sources
After opening the screen recording star, you can only see the black screen. It cannot capture any videos automatically. You should add the source to start capturing. A box named “Sources” is on the bottom of the home page. Please select icon “+” to add source. The screen recording star also supports capturing a game , you can see the selection button in the list too.
- Test your stream and record settings
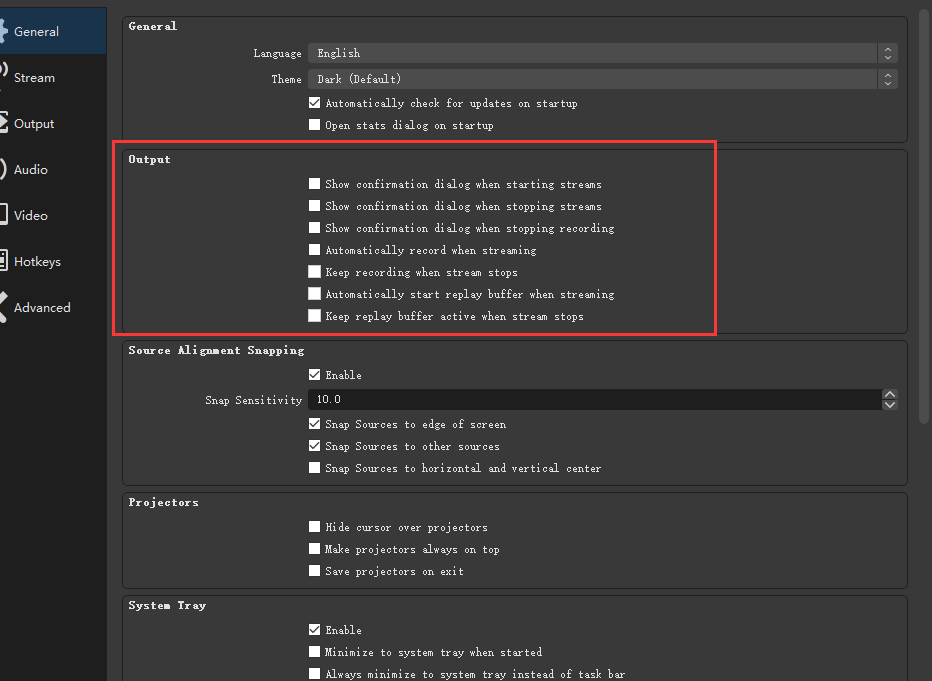
You need to check all your settings (including settings-output) at least two times. Then you can start recording or streaming. However, before all your start work, please assure that the test outcome is good to make sure that there is no issues and sudden questions while running the software. If you need more deep user guide about the screen recording star, please follow our website and read the next passage.
Last, we would like to mention several FAQs. Hope this will be helpful.
Where do I find my recordings after stopping recording?
Once you press “stop recording”, the contents actually saved automatically in your computer. Please find it by selecting File- Show recordings. You have the authority to change the saving location. Change it in File-Settings-Output-Recording
How to change output format?
For example, if you need to output recordings in mp4, follow steps bellow,
File – Remux Recordings
You can quickly and easily convert your video files into mp4.
My video is laggy, how to solve this problem?
Please ensure the sort of the lag, maybe your internet connection is not fluent, you import over-numbered resources, or settings are incorrect.
Hope the content above is helpful for you. Remember to follow our passage updating, the next one will tell you a lot of detailed information.